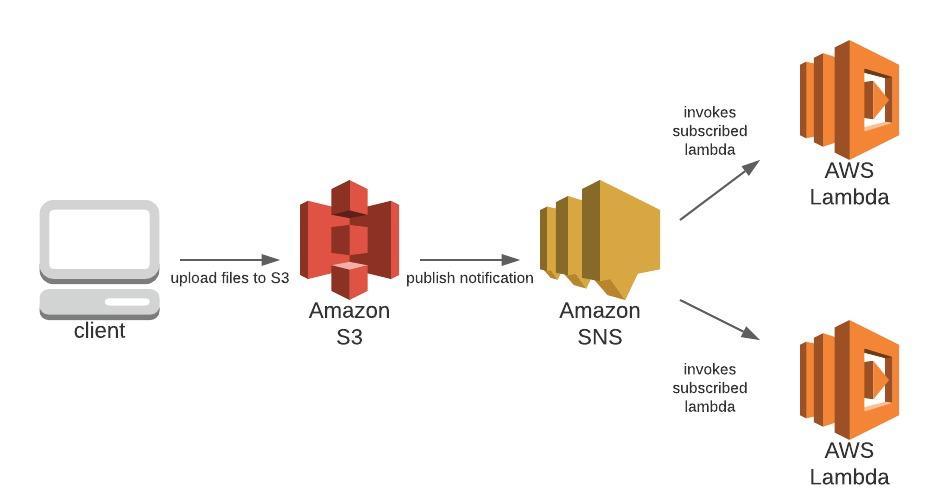
Invalidate the Cache Automatically After Release with AWS S3, SNS, Lambda, and CloudFront
Prerequisite: A common way to host static websites is to store your website files in an AWS S3 bucket and then cache it using AWS CloudFront. This blog article assumes you already have this setup for your website or web application.

Why did we want to invalidate the cache?
At Acorns, our team has had several mishaps and confusions where we asked each other:
- “Why isn’t this feature showing yet? We deployed it a few hours ago.”
- “Some people are seeing the new feature and some of us are seeing the old feature. What the heck is going on?”
- “What version of the app is live right now?”
- “Are you sure you released the new version correctly?
It turns out, we needed to invalidate the cache. Arghh..sometimes, we remembered to invalidate the cache, and sometimes we forgot, and sometimes we spent an hour looking for the problem, only to find out that the app was cached.
Caching is great because it makes the website load faster. However, the bad thing about caching is that sometimes, it loads data that is outdated or stale like an old app version.
Since I didn’t want to remember this step anymore, I decided that it was time…to automate cache invalidation!
Read about what a cache and invalidating the cache is if you’re unsure before proceeding.
Automating cache invalidation
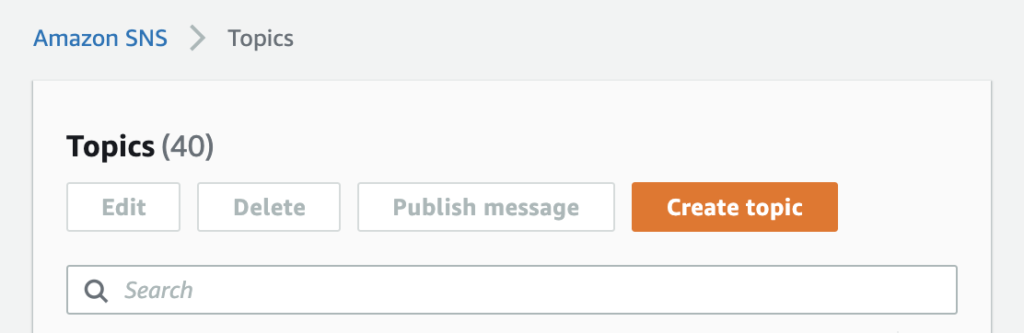
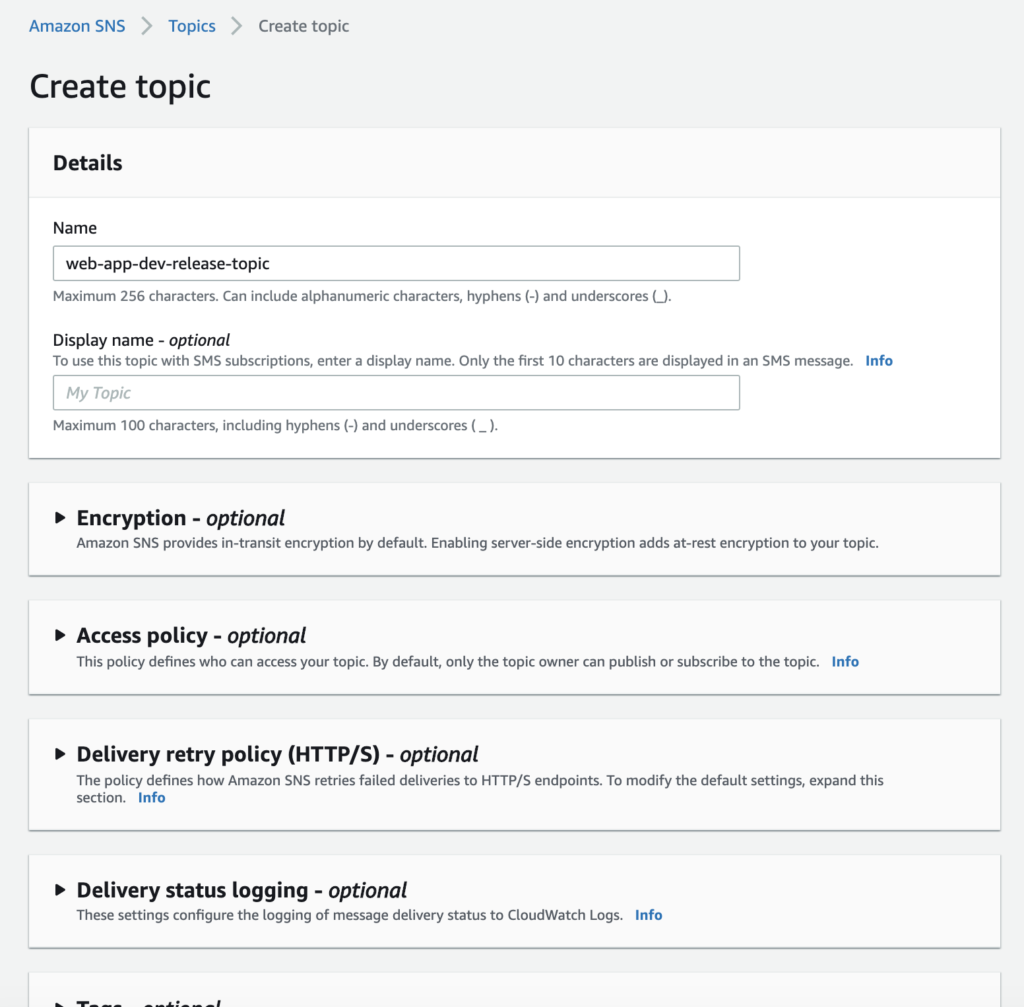
Create SNS Topic
The first step is to create a SNS topic along with its access policy, so that when a message is published to that topic, it can trigger the lambda with the right permissions. We will create the subscription for the topic later.
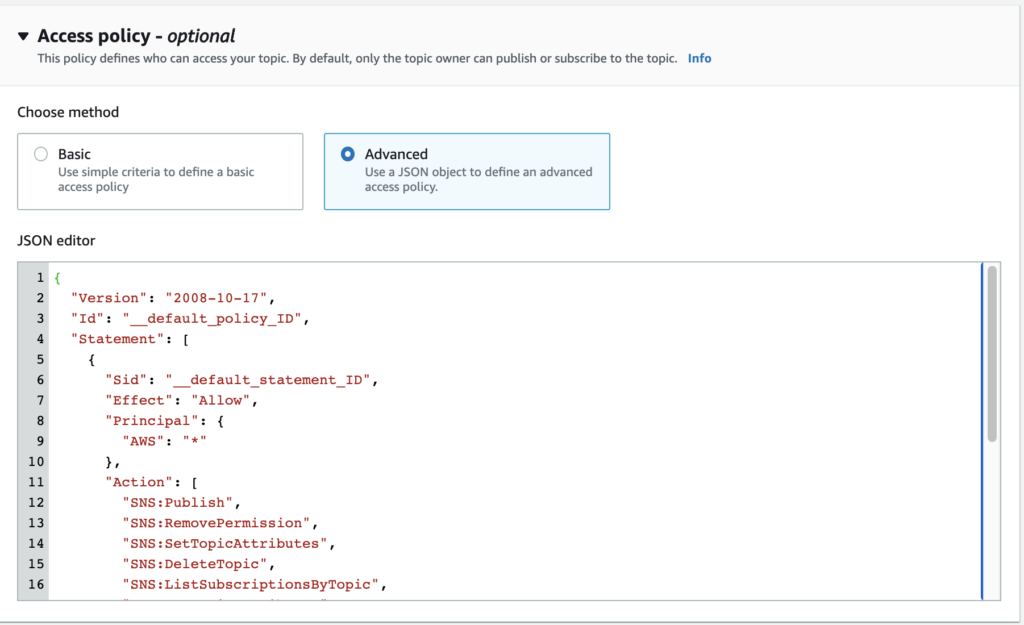
{
  "Version": "2012-10-17",
  "Id": "WebAppReleaseTopicPolicy",
  "Statement": [
    {
      "Sid": "sns-permissions",
      "Effect": "Allow",
      "Principal": {
        "AWS": "*"
      },
      "Action": [
        "SNS:GetTopicAttributes",
        "SNS:SetTopicAttributes",
        "SNS:AddPermission",
        "SNS:RemovePermission",
        "SNS:DeleteTopic",
        "SNS:Subscribe",
        "SNS:ListSubscriptionsByTopic",
        "SNS:Publish",
        "SNS:Receive"
      ],
      "Resource": "arn:aws:sns:us-east-1:123456789012:web-app-dev-release-topic",
      "Condition": {
        "StringEquals": {
          "AWS:SourceOwner": "123456789012"
        }
      }
    },
    {
      "Sid": "publish-from-s3-builds-bucket",
      "Effect": "Allow",
      "Principal": {
        "Service": "s3.amazonaws.com"
      },
      "Action": "SNS:Publish",
      "Resource": "arn:aws:sns:us-east-1:123456789012:web-app-dev-release-topic",
      "Condition": {
        "ArnLike": {
          "aws:SourceArn": "arn:aws:s3:::web-app-dev-builds"
        }
      }
    }
  ]
}
Send Event Notification from S3 Bucket to SNS Topic
Find the version file of your app.
If you have a static website hosted on an S3 bucket, then there will be a file that determines what your users will be seeing when they go to your domain url. When this file changes, then your app version has changed. Most often, this file is index.html.
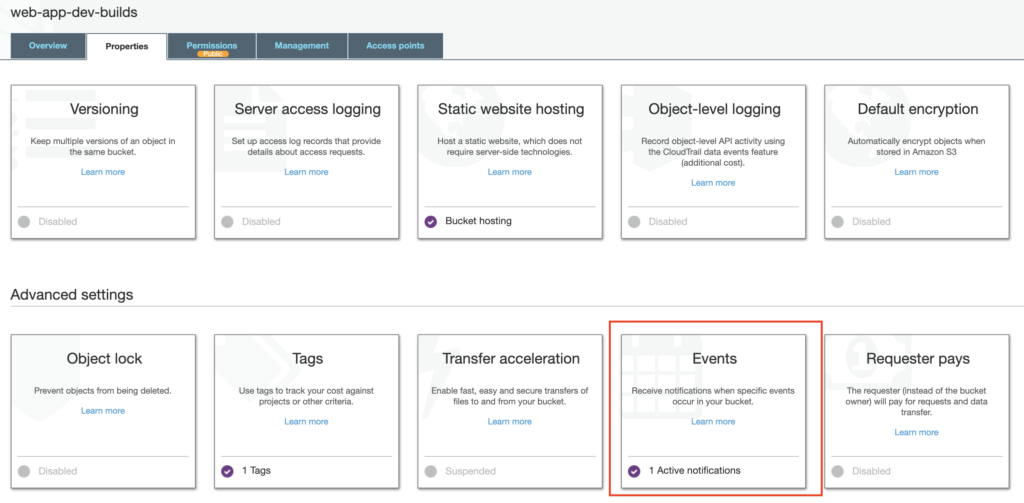
Add event notification on S3 bucket.
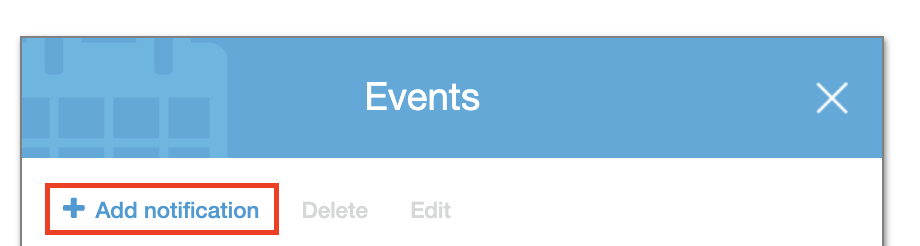
Login to AWS and go to S3. Click on the S3 bucket that contains your app builds. Then go to the Properties tab and click on Events. Inside of Events, click Add Notification.
Add event notification for All object create events with prefix and/or suffix changed to the file that determines your version changes. If your version file is index.html, then prefix should be index and suffix is .html. You can have this event notification send to SNS Topic, SQS Queue, or Lambda Function.
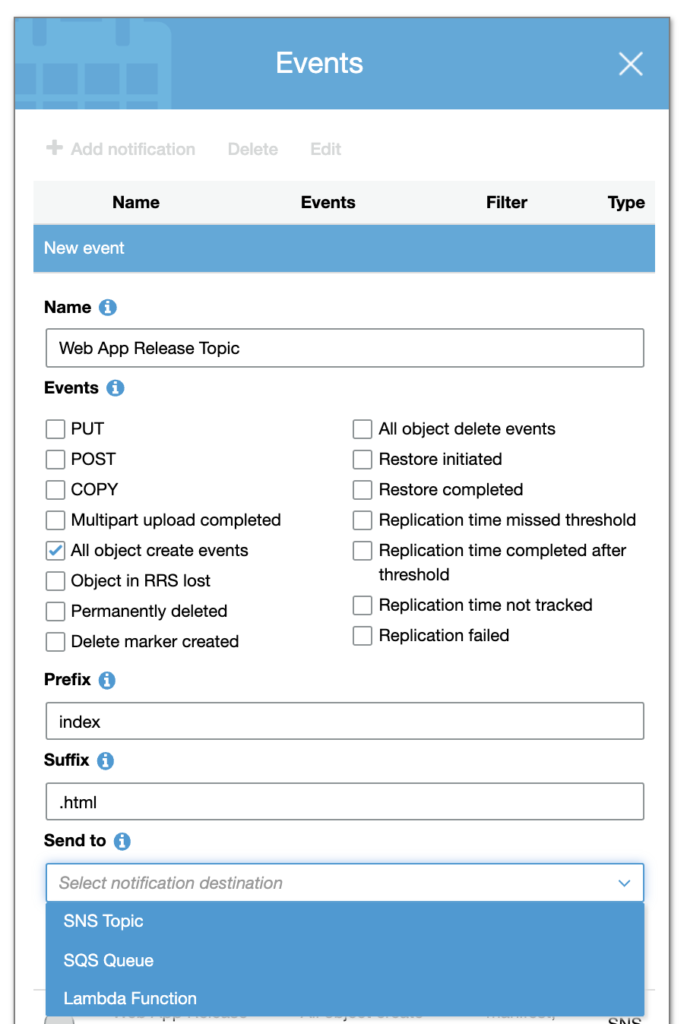
The first time I did this, I sent this event notification to a “Lambda Function.” Basically, this means that if index.html gets uploaded, created, or updated, then this event notification will let me know. It will trigger the lambda, and that lambda can do a something like invalidate the CloudFront cache.
However, I started wanting to make more things happen automatically when a new app version was released, like invalidating the cache (one lambda) and notifying the Slack channel (a separate lambda). That’s when I decided that using an SNS topic was more flexible.

If I used SNS Topic, then I could have multiple lambdas subscribed to that topic and all do a different action. (Another option is just to trigger 1 post-release lambda and put all of those functions in that one lambda, but I thought it’d be better to separate concerns.)
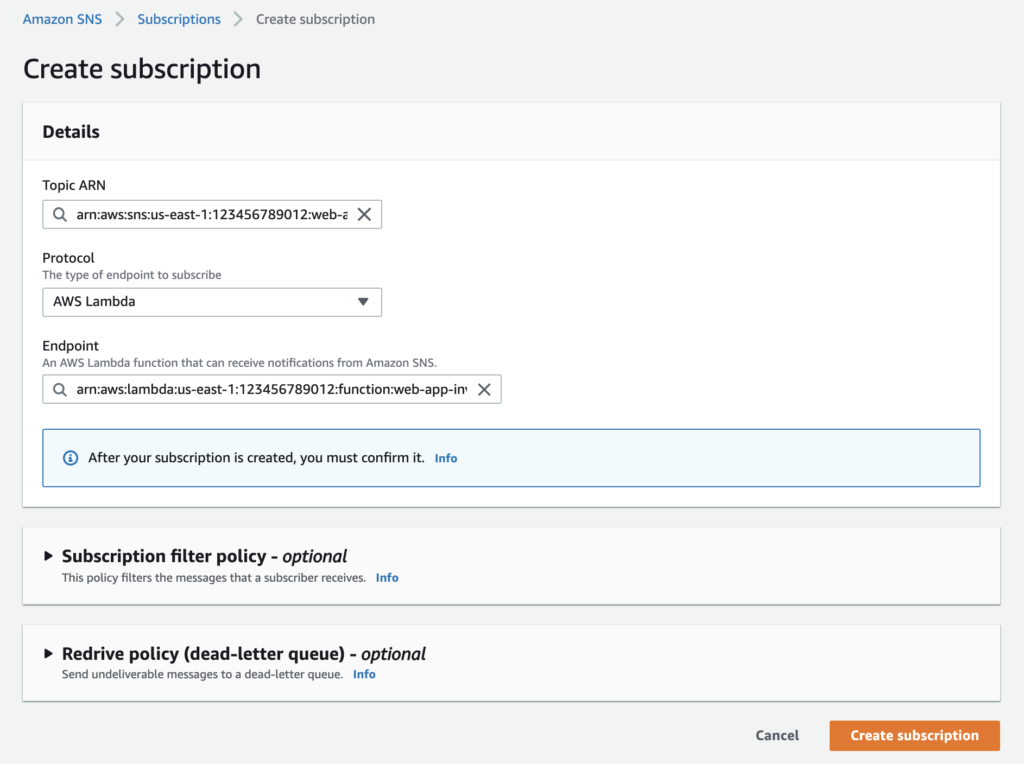
Create SNS Topic Subscription
Once you publish a message to a SNS topic, it really has no true power or effect until something is subscribed to it. When a message is published to a SNS topic, then whatever is subscribed to it (could be a lambda, an email, a text message, a HTTP or HTTPS endpoint, a message to SQS, and more) will be triggered or invoked.
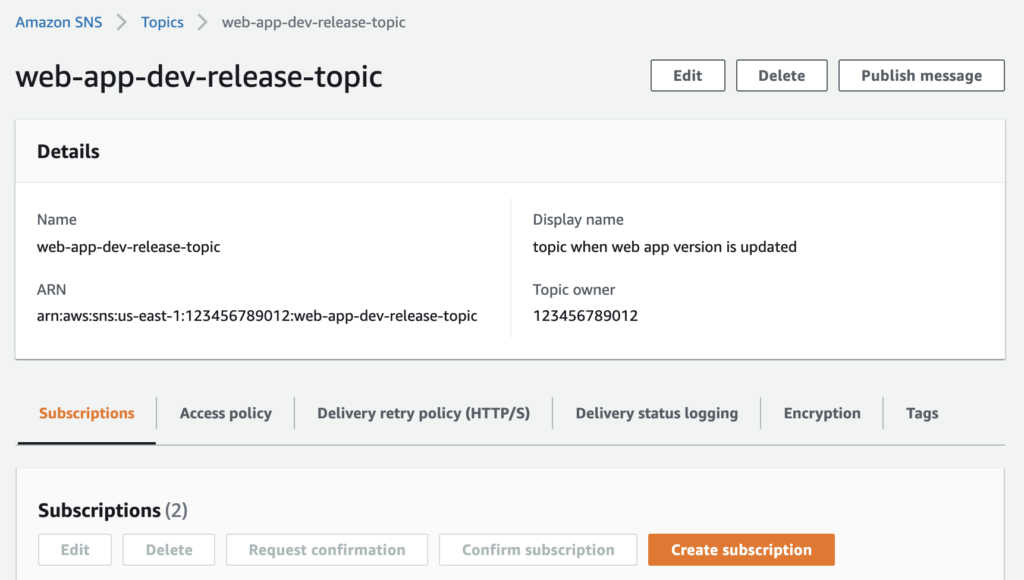
To create that subscription, login to AWS and go to SNS service. Click on the topic that you want create the subscription for, and then click the orange Create subscription button.
You’ll want to select a protocol.
Protocols include:
httpprotocol – URL beginning withhttp://httpsprotocol – URL beginning withhttps://emailprotocol – email addressemail-jsonprotocol – email addresssmsprotocol – phone number of an SMS-enabled devicesqsprotocol – AWS SQS queueapplicationprotocol – a mobile app and device.lambdaprotocol – AWS Lambda function

I selected AWS Lambda protocol, meaning whenever a message is published to this SNS topic, the selected lambda will be invoked.
Setup Typescript Lambda to Invalidate Cache
Lambda Setup
Lambda has these basic settings. Notice that I use “Node.js” for .js and .ts files. The handler points to the file handler.ts and the function that I want run first, which is main(). Thus, combined, it’s handler.main.

Lambda was setup with these environment variables:
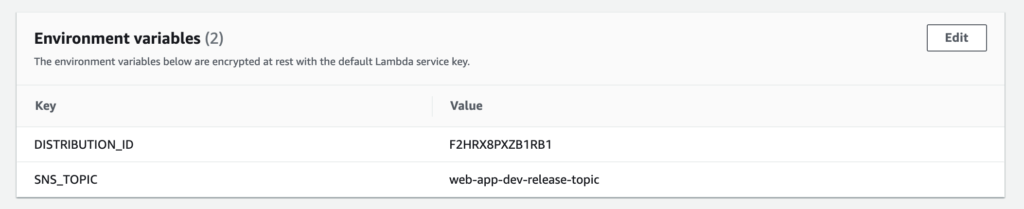
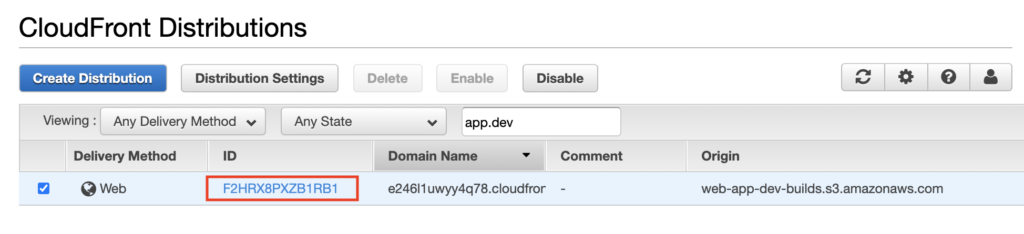
You can find the CloudFront distribution ID for the environment variable here:
You can find the SNS topic for the environment variable here under name:
Typescript Lambda Code
This is the code I used for the lambda that is triggered by the SNS topic.
import * as aws from 'aws-sdk'

export const main = async event => {
  try {
    // replace with whatever file that determines your app has changed versions
    const VERSION_FILE = 'index.html'
    const triggeredTopic = event.Records[0].Sns.TopicArn
    const expectedTopicName = process.env.SNS_TOPIC || ''
    console.log(`triggered topic ${triggeredTopic}`)

    // only invalidate cache if VERSION_FILE is updated
    // a change to VERSION_FILE will trigger the SNS topic that triggers this lambda to invalidate the cache
    if (triggeredTopic.endsWith(expectedTopicName)) {
      const invalidatedItems = [`/${VERSION_FILE}`]
      const params = {
        DistributionId: process.env.DISTRIBUTION_ID || '',
        InvalidationBatch: {
          CallerReference: `web-app-${new Date().getTime()}`,
          Paths: {
            Quantity: 1,
            Items: invalidatedItems,
          },
        },
      }
      const cloudfront = new aws.CloudFront()
      const data = await cloudfront.createInvalidation(params)
      console.log('success create invalidation', JSON.stringify(params))
      return data.promise()
    } else {
      console.log('Cache will not be invalidated')
    }
  } catch (err) {
    if (err) console.error('error invalidating cache', err, err.stack)
    return new Error(err)
  }
}
Result
Pure joy. I never have to invalidate the cache again, or even remember to do it. Whenever we release the app, which means updating files in the S3 bucket, our current setup invalidates the cache automatically. That’s music to my ears. It was happily ever after, at least in terms of caching.
What’s your experience with invalidating the cache?
Have you ever had any issues, mishaps, or confusions when you forgot to invalidate the cache? Do you use a different way to invalidate the cache? Please share your experiences below, and let’s all learn from each other.